Tuesday 18 December 2012

Convert FAT32 to NTFS Without Formatting or Losing Data


You have a flash drive or probably an external hard drive that currently has FAT32 file system and you want to change it to NTFS, because FAT32 does not support handling large files (over 4GB) or it is just simply old for your taste but there is just one problem, you don't want to lose your saved data. This article is for you then as it explains exactly how you can achieve seamless transition from FAT to NTFS without involving any data loss.
Image
FAT32 to NTFS

While it is generally recommended to use the NTFS file system because of its stability, security and lesser defragmentation time, most of us end up using FAT32 because that is what most disks are preformatted with. Unless, we notice the “Not enough disk space error” despite disk space being available, we don't bother to change the file system. Moreover, most of us don't change it because of the risk of losing important data and lack of time (read laziness). As Microsoft was aware of this scenario, they added a capability in the command prompt to overcome this by executing a simple command. There are many software that support this too but the Convert command is one of the easiest ways to do so. Follow the steps below to know how:-

Important: While this method works perfectly, I would still advise you to backup your data in case anything goes wrong.
FAT 32 to NTFS Conversion Steps
1) Go to Computer, and note the name of the drive whose file system you wish to convert.
2) Click on Start.
3) Type cmd in the search bar if you use Windows 7, Windows 8 or Windows Vista. If you use Windows XP, click on Run and then execute cmd.
4) Execute "chkdsk h: /f " (without quotes) where H is the letter of the drive to undergo conversion. This checks the drive for errors and fixes them automatically.
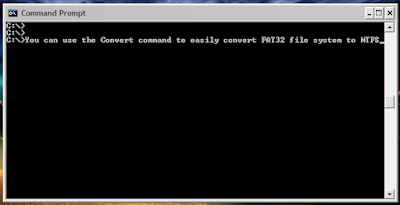
5) Execute "Convert H: /FS:NTFS" (without quotes). H is again the letter of the drive to be converted.
6) The command prompt will start the conversion process and after a few minutes, CMD will say that conversion was successful.
7) You can check it in the properties of the drive through right click<Properties.
Image
Convert FAT to NTFS

This works on Windows 7, Windows XP, Windows 8 and Windows Vista. I converted my flash drive's file system using these steps and it worked flawlessly. It is interesting to note that this method cannot be used to reconvert NTFS file system back to FAT32. To reconvert back to FAT32, you will need to format the entire drive which will definitely cause data loss.

Install, Boot Windows from USB Pen, Thumb or Flash Drive


Normally, Windows is installed using optical media like DVDs and CDs but there are times when it is not possible to boot into the windows setup using disks probably because your DVD drive is not working or, if you are using one of those ultra-portable laptops, it is not there at all.
Image
Install Windows XP, Windows 7, Windows Vista from USB drive
To overcome this problem, one can either use an external DVD drive and install Windows normally or create a bootable pen drive to install Windows whenever needed. In this tutorial, we will discuss about the latter and learn how can we create a bootable USB drive for installing Windows XP, Windows Vista or Windows 7. As installing Windows from a flash drive is much faster than from a CD/ DVD, such an installation will also save time.

This article assumes that your computer has a mother board which supports booting from USB drives. Most modern laptops and desktops support it. If you have bought your computer in the past 5 years, you do not need to worry about this.

Installation Requirements

An empty flash drive with a storage capacity of 1GB for Windows XP and 3GB for Windows 7, Windows Vista and Windows Server 2008.
Windows installation disk or Windows installation files stored somewhere on your computer.

Steps to create a bootable USB Flash Drive

Download Win to Flash. The software is still in beta phase so it is possible that it has some bugs although I have personally faced none. The latest version of Win to Flash can be downloaded from the Win to Flash website. To avoid this tutorial from getting outdated, I would advise to download the software from the former link.
Extract the downloaded zip file to any folder on your desktop. 
Open the folder and run WintoFlash.exe by double clicking on it.
Click Next, check I accept EULA, click Next and Next again. Wait for the software to load some ads, click Next and Next again. 
A welcome screen like one in the image below will show up.
Image
Install Windows USB Flash Drive
Win to Flash welcome screen
Click on the big green tick. The welcome screen will turn translucent and WinToFlash wizard will open.
Bootable Windows XP, 7, Vista Pen Drive
Image
Wizard showing the various version of Windows it supports
Click Next. On Windows File path entry box, click Select button and select the location of your Windows disk, or the folder containing the Windows setup files and click OK.
On USB Drive path entry box, select your USB flash drive's location and click OK.
Click Next button. In the dialog box, encircle I accepted the license agreement and click Continue.
A warning message will be displayed saying that "Formatting will erase all data on the disk". Click OK on the message.
WintoFlash will show a window with a progress bar like the one in the image below.
Image
Bootable Windows 7, XP, Vista
Preparing a bootable pen drive
After the progress bar reaches the end, press Next and then press Exit. A notification to update WintoFlash might be shown, click "No just close" to close it.

That's it. You now have a bootable pen drive that can be used to install Windows. To install Windows from it, follow the steps given below:-
Installing Windows from the bootable USB Thumb Drive

Plugin your thumb drive.
Start your computer. Go into the BIOS setup by pressing the Delete key. In the boot menu, select your flash drive as the first boot device. Save settings and restart your PC. (This step might be different for different computers. Check your system guide to know how to change the boot order in your PC.)
Windows setup will load.
Install Windows by following the on-screen instructions.

This tutorial works on all versions of Windows including Windows 7, Windows Xp and Windows Vista.

Create a Shortcut to lock your Computer


Have you ever left your PC in a hurry? Have you ever felt that it is a pain to lock your system in the simple way of doing CTRL+ALT+DEL? I would imagine that you have and then, this trick is for you. This trick enables you to create a shortcut to lock your computer instead of doing the regular CTRL+ALT+DEL, thus providing you a way to quickly and easily get away from your PC whenever you are in a hurry.

To use this trick, follow the instructions given below:-

Steps

Right Click on an empty slot on Desktop, point to New and click on Shortcut.
In the dialog box that pops up, type the following code without quotes in the Type the location of the item.

Code: Select all
    rundll32 user32.dll,LockWorkStation


3. Click on Next and type a name for the shortcut in the Type a name for this 
Shortcut textbox.
4. Click on Finish.
Image
Create a Shrtcut to lock your System

Now you will be able to lock your computer by double clicking on the created shortcut. You can also add this shortcut to Quick Launch toolbar to lock your system with only a single click.


Make your Computer Welcome You:

Do you watch movies? Have you always loved the way how Computers in movies welcome their users by calling out their names? I bet that you too would want to know how you can achieve similar results on your PC and have a computer said welcome.

Then you are at the right place, this article describes exactly how you can make your computer welcome you like this.

With this trick, you can make your Computer welcome you in its computerized voice. You can make your Windows based computer say "Welcome to your PC, Username."

Make Windows Greet you with a Custom Voice Message at Startup

To use this trick, follow the instructions given below:-

Click on Start. Navigate to All Programs, Accessories and Notepad.
Copy and paste the exact code given below.
Dim speaks, speech
speaks="Welcome to your PC, Username"
Set speech=CreateObject("sapi.spvoice")
speech.Speak speaks


3. Replace Username with your own name.
4. Click on File Menu, Save As, select All Types in Save as Type option, and save the file as Welcome.vbs or "*.vbs".
5. Copy the saved file.
6. Navigate to C:\Documents and Settings\All Users\Start Menu\Programs\Startup (in Windows XP) or to C:\Users\ User-Name\AppData\Roaming\Microsoft\Windows\Start Menu\Programs\Startup (in Windows 7 and Windows Vista) if C: is your System drive.
7. Paste the file.

Image

Make your Computer Welcome you at startup

Now when the next time you start your computer, Windows will welcome you in its own computerized voice.

Note: For best results, it is recommended to change sound scheme to No Sounds.
You can change the sound scheme to No Sounds by following the steps given below:-

Go to Control Panel.
Then click on Switch to Classic View.
Then Click on Sounds and Audio Devices.
Then Click on the Sounds Tab.
Select No Sounds from the Sound Scheme option.
If you wish to save your Previous Sound Scheme, you can save it by clicking Yes in the popup menu.
Click on OK.

Image
Change Sound Scheme to No Sounds

Try it yourself to see how it works. In my personal opinion, this is an excellent trick. Whenever I start my PC in front of anybody and the PC welcomes me, the fellow is left wondering how brilliant a computer do I have.

Friday 14 December 2012


Windows 7 how to turn off the option to password log in 

Start your computer or laptop when you first insert the password opens the page in which you must type the password and type in the password when you open your computer or laptop. If your computer or laptop Without permission to let anyone use the password option, then fine, but if you have no other use of the computer or laptop does not mean you can turn off the password option after pressing the START button will bring you directly to the desktop.
To turn off the password option and click the Start button and then click Run to open the Run window engaged in the search box, type control userpasswords2 and press OK.


After pressing OK will open a second window above it, left click on the user.


Follow me engaged after clicking User Users must enter a user name and password to use this computer hurricanes box next to Czech Krden uninstall and then press OK below.
If the password option when you start your computer and you would not want the option of password Apnaie this process and then the Users must enter a user name and password to use this computer Krden ticking the box next to hurricanes .


list-of-all-run-commands

Go to Start Menu – Run and type in the command to run the specific application. Command are in front of the Program, while program names are first in the list. So, It comes in handy if you have the list of all programs with you.
Run command increases you productivity and saves lot of time as you don’t require to access start menu to launch any application or system utility.
Run Commands Listed below In Alphabetical Order
To search Press Ctrl +F & type the Action you need to do.


Program = Run Command
Accessibility Controls = access.cpl
Accessibility Wizard = accwiz
Add Hardware Wizard = hdwwiz.cpl
Add/Remove Programs = appwiz.cpl
Administrative Tools = control admintools
Adobe Acrobat ( if installed ) acrobat
Adobe Distiller ( if installed ) = acrodist
Adobe ImageReady ( if installed ) = imageready
Adobe Photoshop ( if installed ) = photoshop
Automatic Updates = wuaucpl.cpl
Basic Media Player = mplay32
Bluetooth Transfer Wizard = fsquirt
Calculator = calc
Ccleaner ( if installed ) = ccleaner
C: Drive = c:
Certificate Manager = cdrtmgr.msc
Character Map = charmap
Check Disk Utility = chkdsk
Clipboard Viewer = clipbrd
Command Prompt = cmd
Command Prompt = command
Component Services = dcomcnfg
Computer Management = compmgmt.msc
Compare Files = comp
Control Panel = control
Create a shared folder Wizard = shrpubw
Date and Time Properties = timedate.cpl
DDE Shares = ddeshare
Device Manager = devmgmt.msc
Direct X Control Panel ( if installed ) = directx.cpl
Direct X Troubleshooter = dxdiag
Disk Cleanup Utility = cleanmgr
Disk Defragment = dfrg.msc
Disk Partition Manager = diskmgmt.msc
Display Properties = control desktop
Display Properties = desk.cpl
Display Properties (w/Appearance Tab Preselected ) = control color
Dr. Watson System Troubleshooting Utility = drwtsn32
Driver Verifier Utility = verifier
Ethereal ( if installed ) = ethereal
Event Viewer = eventvwr.msc
Files and Settings Transfer Tool = migwiz
File Signature Verification Tool = sigverif
Findfast = findfast.cpl
Firefox = firefox
Folders Properties = control folders
Fonts = fonts
Fonts Folder = fonts
Free Cell Card Game = freecell
Game Controllers = joy.cpl
Group Policy Editor ( xp pro ) = gpedit.msc
Hearts Card Game = mshearts
Help and Support = helpctr
Hyperterminal = hypertrm
Hotline Client = hotlineclient
Iexpress Wizard = iexpress
Indexing Service = ciadv.msc
Internet Connection Wizard = icwonn1
Internet Properties = inetcpl.cpl
Internet Setup Wizard = inetwiz
IP Configuration (Display Connection Configuration) = ipconfig /all
IP Configuration (Display DNS Cache Contents) = ipconfig /displaydns
IP Configuration (Delete DNS Cache Contents) = ipconfig /flushdns
IP Configuration (Release All Connections) = ipconfig /release
IP Configuration (Renew All Connections) = ipconfig /renew
IP Configuration (Refreshes DHCP & Re-Registers DNS) = ipconfig /registerdns
IP Configuration (Display DHCP Class ID) = ipconfig /showclassid
IP Configuration (Modifies DHCP Class ID) = ipconfig /setclassid
Java Control Panel ( if installed ) = jpicpl32.cpl
Java Control Panel ( if installed ) = javaws
Keyboard Properties = control keyboard
Local Security Settings = secpol.msc
Local Users and Groups = lusrmgr.msc
Logs You Out of Windows = logoff
Malicious Software Removal Tool = mrt
Microsoft Access ( if installed ) = access.cpl
Microsoft Chat = winchat
Microsoft Excel ( if installed ) = excel
Microsoft Diskpart = diskpart
Microsoft Frontpage ( if installed ) = frontpg
Microsoft Movie Maker = moviemk
Microsoft Management Console = mmc
Microsoft Narrator = narrator
Microsoft Paint = mspaint
Microsoft Powerpoint = powerpnt
Microsoft Word ( if installed ) = winword
Microsoft Syncronization Tool = mobsync
Minesweeper Game = winmine
Mouse Properties = control mouse
Mouse Properties = main.cpl
MS-Dos Editor = edit
MS-Dos FTP = ftp
Nero ( if installed ) = nero
Netmeeting = conf
Network Connections = control netconnections
Network Connections = ncpa.cpl
Network Setup Wizard = netsetup.cpl
Notepad = notepad
Nview Desktop Manager ( if installed ) = nvtuicpl.cpl
Object Packager = packager
ODBC Data Source Administrator = odbccp32
ODBC Data Source Administrator = odbccp32.cpl
On Screen Keyboard = osk
Opens AC3 Filter ( if installed ) = ac3filter.cpl
Outlook Express = msimn
Paint = pbrush
Password Properties = password.cpl
Performance Monitor = perfmon.msc
Performance Monitor = perfmon
Phone and Modem Options = telephon.cpl
Phone Dialer = dialer
Pinball Game = pinball
Power Configuration = powercfg.cpl
Printers and Faxes = control printers
Printers Folder = printers
Private Characters Editor = eudcedit
Quicktime ( if installed ) = quicktime.cpl
Quicktime Player ( if installed ) = quicktimeplayer
Real Player ( if installed ) = realplay
Regional Settings = intl.cpl
Registry Editor = regedit
Registry Editor = regedit32
Remote Access Phonebook = rasphone
Remote Desktop = mstsc
Removable Storage = ntmsmgr.msc
Removable Storage Operator Requests = ntmsoprq.msc
Resultant Set of Policy ( xp pro ) = rsop.msc
Scanners and Cameras = sticpl.cpl
Scheduled Tasks = control schedtasks
Security Center = wscui.cpl
Services = services.msc
Shared Folders = fsmgmt.msc
Sharing Session = rtcshare
Shuts Down Windows = shutdown
Sounds Recorder = sndrec32
Sounds and Audio = mmsys.cpl
Spider Solitare Card Game = spider
SQL Client Configuration = clicongf
System Configuration Editor = sysedit
System Configuration Utility = msconfig
System File Checker Utility ( Scan Immediately ) = sfc /scannow
System File Checker Utility ( Scan Once At Next Boot ) = sfc /scanonce
System File Checker Utility ( Scan On Every Boot ) = sfc /scanboot
System File Checker Utility ( Return to Default Settings) = sfc /revert
System File Checker Utility ( Purge File Cache ) = sfc /purgecache
System File Checker Utility ( Set Cache Size to Size x ) = sfc /cachesize=x
System Information = msinfo32
System Properties = sysdm.cpl
Task Manager = taskmgr
TCP Tester = tcptest
Telnet Client = telnet
Tweak UI ( if installed ) = tweakui
User Account Management = nusrmgr.cpl
Utility Manager = utilman
Volume Serial Number for C: = label
Volume Control = sndvol32
Windows Address Book = wab
Windows Address Book Import Utility = wabmig
Windows Backup Utility ( if installed ) = ntbackup
Windows Explorer = explorer
Windows Firewall = firewall.cpl
Windows Installer Details = msiexec
Windows Magnifier = magnify
Windows Management Infrastructure = wmimgmt.msc
Windows Media Player = wmplayer
Windows Messenger = msnsgs
Windows Picture Import Wizard (Need camera connected) = wiaacmgr
Windows System Security Tool = syskey
Windows Script host settings = wscript
Widnows Update Launches = wupdmgr
Windows Version ( shows your windows version ) = winver
Windows XP Tour Wizard = tourstart
Wordpad = write
Zoom Utility = igfxzoom

Some useful software for your computer |


Some useful software for the computer you used in your computer, you can according to your needs | Disk Check, Uninstaller, Puran Startup Manager, Disk Cleaner, Delete Empty Folders, Fix Shortcuts, Registry Cleaner, Registry Defrag, Duplicate File Finder, Data Recovery, Permanent Delete, Shutdown Timer.


Click here to download. 

Way to get XP product CODE from CD


It really work
There is a way to get the xp product code from the cd
just explorer the cd then
open the folder I386
then open the file UNATTEND.TXT and
scroll down to the last line
and it goes to show what dumbasses microsoft are u have a product code.
Have fun u never need to search for a product code for xp again...!!!!

Create Your Own Logon Message:


1 Click start
click run
type regedit,
then click ok!

2 In The registry editor, drill down to the following key:
HKEY_LOCAL_MACHINE\software\Microsoft\Windows NT\Current version\Winlogon.

3 Right click LegalNoticeCaption,
click modify,
Type: THIS IS NEXT TRICK,and then click ok!

4 Right click legalNoticeText,
click modify, and then Close your message!

5 Restart Your Computer.

6 The message will appear every time you logon!

Recover the lost administrators password in Windows XP:


Slightly more work needed if you lose or forget the Windows XP administrator password.

1.First reboot Windows XP in safe mode by re-starting the computer and pressing F8 repeated as the computer starts up.

2.Then (in safe mode) click Start and then click Run. In the open box type "control userpasswords2" without the quotes - I have just used quotes to differentiate what you have to type.

3.You will now have access to all the user accounts, including the administrators account and will be able to reset the lost password.

4.Just click the administrators user account, and then click Reset Password.

5.You will need to add a new password in the New password and the Confirm new password boxes, and confirm by clicking OK.


All done, you have recovered the lost adminitrators password!

Hidden Programs In Windows XP !


Is it strange to hear , but true that some good programs are hidden in Windows XP !!!

Programs :

1. Private Character Editor :

Used for editing fonts,etc.
** start>>Run
** Now, type eudcedit

2. Dr. Watson :

This an inbuilt windows repairing software !
** start>>Run
** Now, type drwtsn32

3. Media Player 5.1 :

Even if you upgrade your Media Player, you can still access your old player in case the new one fails !!!
** start>>Run
** Now, type mplay32

4. iExpress :

Used to create SetupsYou can create your own installers !
** start>>Run
** Now, type iexpress

All (Ctrl+Alt+Del) Permanently deleted files Recovery solution:


Sometimes we delete the files permanently, and realize that deleting them is like a Blunder...

For all those folks,
Here is the solution

Software called "Kissass Undelete" , can bring those files from the hard disk or your flash drive.
Conditions : Only if the data on that drive is not re-occupied(or written). that means the space which was available after the deletion is not been occupied after the deletion.

Click Here to download the .

1)
To start searching for the files,
Select the drive from the Left panel of the Windows and Click the scan button.
the Scan might take upto 10 secs.

2)
When the files search has been completed, it will show you the results with the name, typ, size and the last modified date of the searched file.

3) Now you can select the file to be recover. This is an Open source application and available for All Windows OS(Windows XP/Vista/ 7). 

How to Create Folder "CON":


Ever tried to create a folder "CON" or "AUX" or "NUL".


Tried now???  - not working :)

Here you go, a simple method to  stop your anxiety

Rename folder from the right click option........
Now press alt and press 255...
press 255 frm the right side of the key bords i.e, Num pad.
where only numbers are given.....
now write con and then press enter.....yayyy!!
you ll see a con folder in ur pc
and also you can delete it easily...........

Thursday 6 December 2012

Hide Drives in Windows Xp Without Any softwares

For Hide:


1. Start
2. Run & type "CMD" (without quotes) 


3. Type "Diskpart" (without quotes)  


4. Type "List Volume" (without quotes)
 

5. Type "Select Volume # " (without quotes)          
     # = Volume Number


6. Type "Remove letter #"  (without quotes) 
        # = Drive letter


For Show Drive

1. Repeat 1 to 5 steps


2. Type "Assign letter #" (without quotes)
       # = Drive Letter